
FreeBSD Features
With so many options for operating systems, it can be hard to tell them all apart. This highlights a few features that differentiates FreeBSD from alternatives.
OpenZFS File System
OpenZFS is a mature, sophisticated, and much-loved file system. FreeBSD is one of the only operating systems to offer it as a fully integrated feature and not as manual add-on. This means it’s painless to choose ZFS from the installer, and you won’t have to worry during system upgrades.
ZFS Storage Pools
ZFS offers many feature you’d expect from a file system like the ability to format a storage device as ZFS and see how much storage space you have available. But where most file systems expect a single device, ZFS can handle the task of making several devices work together as a "storage pool."
In the example depicted you can see a 32.7 TB zpool called "zstore". The zpool-status(8) output tells us that zstore is made of up four ada(4) devices, that are configured as two striped mirrors. In this configuration, any disk could fail and zfs would alert you and allow you to replace it, and all without powering down. In addtion, features like zpool-scrub(8) allow you to proactively check your devices for inconsistencies and correct them when found.
$ zpool list -o name,size,alloc
NAME     SIZE  ALLOC
zroot   7.23T  4.33T
zstore  32.7T  18.5T

$ zpool status zstore
  pool: zstore
 state: ONLINE
  scan: scrub repaired 0B in 15:40:13 with 0 errors on Thu May 15 2025
config:

        NAME        STATE     READ WRITE CKSUM
        zstore      ONLINE       0     0     0
          mirror-0  ONLINE       0     0     0
            ada0    ONLINE       0     0     0
            ada1    ONLINE       0     0     0
          mirror-1  ONLINE       0     0     0
            ada2    ONLINE       0     0     0
            ada3    ONLINE       0     0     0

errors: No known data errors
ZFS Data Sets
With an available storage pool, you can start creating data sets. You simply zfs-create(8) them and you immediately have an accessible directory with its own independent set of attributes. It replaces the need to manage attributes and mount points in fstab(5). Moreover, it opens many new possibilities, like the ability to snapshot data (and revert to a snapshot if needed).
In the example shown, we see a new data set called stuff on the ZFS storage pool zroot is created and mounted at /usr/local/stuff. After creation, an imporant document important_doc.txt is added. Because it’s so important a snapshot of the data set is created called justincase. Sometime later, all files in /usr/local/stuff are accidentally deleted. With zfs-rollback(8) this mishap is easy to resolve. Setup your own snapshot solution, or use ports like sanoid and zrepl to manage it for you.
==> We need to save some important stuff
# zfs create -o mountpoint=/usr/local/stuff zroot/stuff
# touch /usr/local/stuff/important_doc.txt
# zfs snapshot zroot/stuff@justincase

# zfs list -t all -r zroot/stuff
NAME                     USED  AVAIL  REFER  MOUNTPOINT
zroot/stuff               96K  2.78T    96K  /usr/local/stuff
zroot/stuff@justincase     0B      -    96K  -

==> ok, let's list all the files in that directory
# rm /usr/local/stuff/*
==> wait, did I just type rm instead of ls?!
# ls /usr/local/stuff/
==> whoops, it's gone!

==> Let's rollback to our snapshot.
# zfs rollback zroot/stuff@justincase
# ls /usr/local/stuff/
important_doc.txt
==> Phew! saved by the snapshot
ZFS Boot Environments
A ZFS boot environment is a bootable snapshot of preselected parts of a system. They are designed to allow you to boot to known good states. When performed before any substantial change, they reduce the risk tp effectively nothing. For example, if you had a power failure during a system upgrade that resulted ina corrupt system, you could simply restart the system and it would default to the snapshot automatically created before your upgrade. The result is tour system will start in exact the state it was in prior to the start of the upgrade.
The primary interface to manage boot environments is bectl(8). In the example, the user wanted to try out the BETA pre-releases for 14.3. Any pre-release software can be risky, but with boot environments should that BETA turn out to do something destructive the user could simply revert back to a previous state. Moreover, you can create your own boot enviroments at any time. In the latter portion of the example it seems the user is about to attempt installing the CURRENT branch of FreeBSD. With boot environments this can be attempted stress free.
==> Boot environments get automatically created with freebsd-update(8)

$ bectl list
BE                                Active Mountpoint Space Created
14.2-RELEASE-p3_2025-05-02_211812 -      -          1.84M 2025-05-02 21:18
14.2-RELEASE_2025-04-23_203902    -      -          109M  2025-04-23 20:39
14.3-BETA1_2025-05-02_212026      -      -          1.41M 2025-05-02 21:20
14.3-BETA1_2025-05-09_223247      -      -          3.42M 2025-05-09 22:32
14.3-BETA2_2025-05-09_223532      -      -          1.38M 2025-05-09 22:35
14.3-BETA2_2025-05-16_171636      -      -          3.33M 2025-05-16 17:16
14.3-BETA3_2025-05-16_171842      -      -          1.34M 2025-05-16 17:18
default                           NR     /          4.18G 2025-04-23 20:30

==> About to do somthing risky? Create your own!

$ sudo bectl create 14.3B-Pre-Switch-To-CURRENT

==> If you ever need to use one, press "8" at the boot loader screen.
==> and select whichever environment you want to revert to.
Bhyve Virtualization
FreeBSD comes with bhyve, a feature-rich type 2 hypervisor. bhyve supports virtio hardware, PCI passthrough, and high-performance emulated NVMe. Run bhyve(8) directly, or leverage tools like vm-bhyve(8) to simplify management of virtual machines.
Simple VM Management with vm-bhyve
Getting started with virtualization can be daunting as there are so many things to consider. Luckily, a port called vm-bhyve will get you going quickly. Morevover, it keeps an exact log of the bhhyve commands it constructs for you, so when you feel bold enough to fine-tune your virtual machine, you’ll have an excellent starting point.
In the example, we see that in just four commands the user is able to get a new VM up and running. (As side note, there are a few setup steps the first time you use vm-bhyve, but they’re quite simple too and well documented in the manual.) More importantly, vm-bhyve keeps logs with exact details about how our VM was started. This provides an excellent primer for when the user wants to try more nuanced setups.
# vm iso https://download.example.com/installer.iso
# vm create my-vm
# vm install my-vm installer.iso
# vm console my-vm

==> That's it. From here you'd be in your guest OS's installer.

==> When you're done, a look at the logs will give you all the
==> bhyve parameters that were used to start your VM.

# tail -n20 /bhyve/my-vm/vm-bhyve.log

bhyve options: -c 4 -m 8G -AHPw
               -l bootrom,/usr/local/share/uefi-firmware/BHYVE_UEFI.fd \
               -U 8e2a0da9-2320-11f0-9347-b8cef693c196 -u -S
bhyve devices: -s 0,hostbridge -s 31,lpc \
               -s 4:0,virtio-blk,/bhyve/my-vm/disk0.img \
               -s 5:0,passthru,1/0/19

==> When you're ready to try more complex things, use those parameters
==> as a starting point and call byhyve directly.
Jails
FreeBSD jails are isolated environments that allow you to partition your system’s workload. They build upon chroot(8) concepts and create a safe environment, separate from the rest of the system. Processes created in a jailed environment can not access files or resources outside of it unless explicitly allowed. Want to run a web server with its own isolated file system and networking? Put it in a jail. Use the built-in jail(8) command or leverage tools like Bastille to make jail management trivial.
Bastille for Jail Management
Jails can be directly managed, but ports like Bastille wrap the jail command in thoughtful logic to make most jail setups very simple to accomplish.
The Bastille site has a nice getting started with Bastille document. The example here gives a brief feel for how simple managing jails can be. It appears the user wants a jailed web server. In one command they name and create a jail called "webserver" with a specific release of FreeBSD and its own IP address. And with that command, it’s ready to go! From here the user can issue commands from the host, or connect to the guest’s console and manage it just like any other FreeBSD instance. And since it has it’s own IP, an ssh service can be started and allow this user to remotely manage the web server without ever touching the host environment.
# bastille create webserver 14.2-RELEASE 10.0.1.50/24

==> That's it! You have a functional jail named "webserver"
==> Now you can start using it like an independent system

==> You can accomplish tasks from the host ...

# bastille pkg webserver install -y nginx
  // output omitted, but would show here
# bastille cmd webserver top
  // output omitted, but would show here

==> ... or connect to the guest console and interact directly
==> with the isolated environment

# bastille webserver console
# hostname
webserver
# exit
# hostname
host_os
Documentation
FreeBSD prides itself in having comprehensive, well-written documentation. You’ll find it on the documentation page, and perhaps more importantly you’ll find it as part of the FreeBSD OS itself. Tools like apropos(1) make finding docs simple.
FreeBSD Handbook
The FreeBSD Handbook is one of the hallmarks of FreeBSD documentation. If you were taking a college course on FreeBSD, this would be the course text book. It starts with concepts, walks you though the steps to get up and running, and then steps through every core feature of the OS.
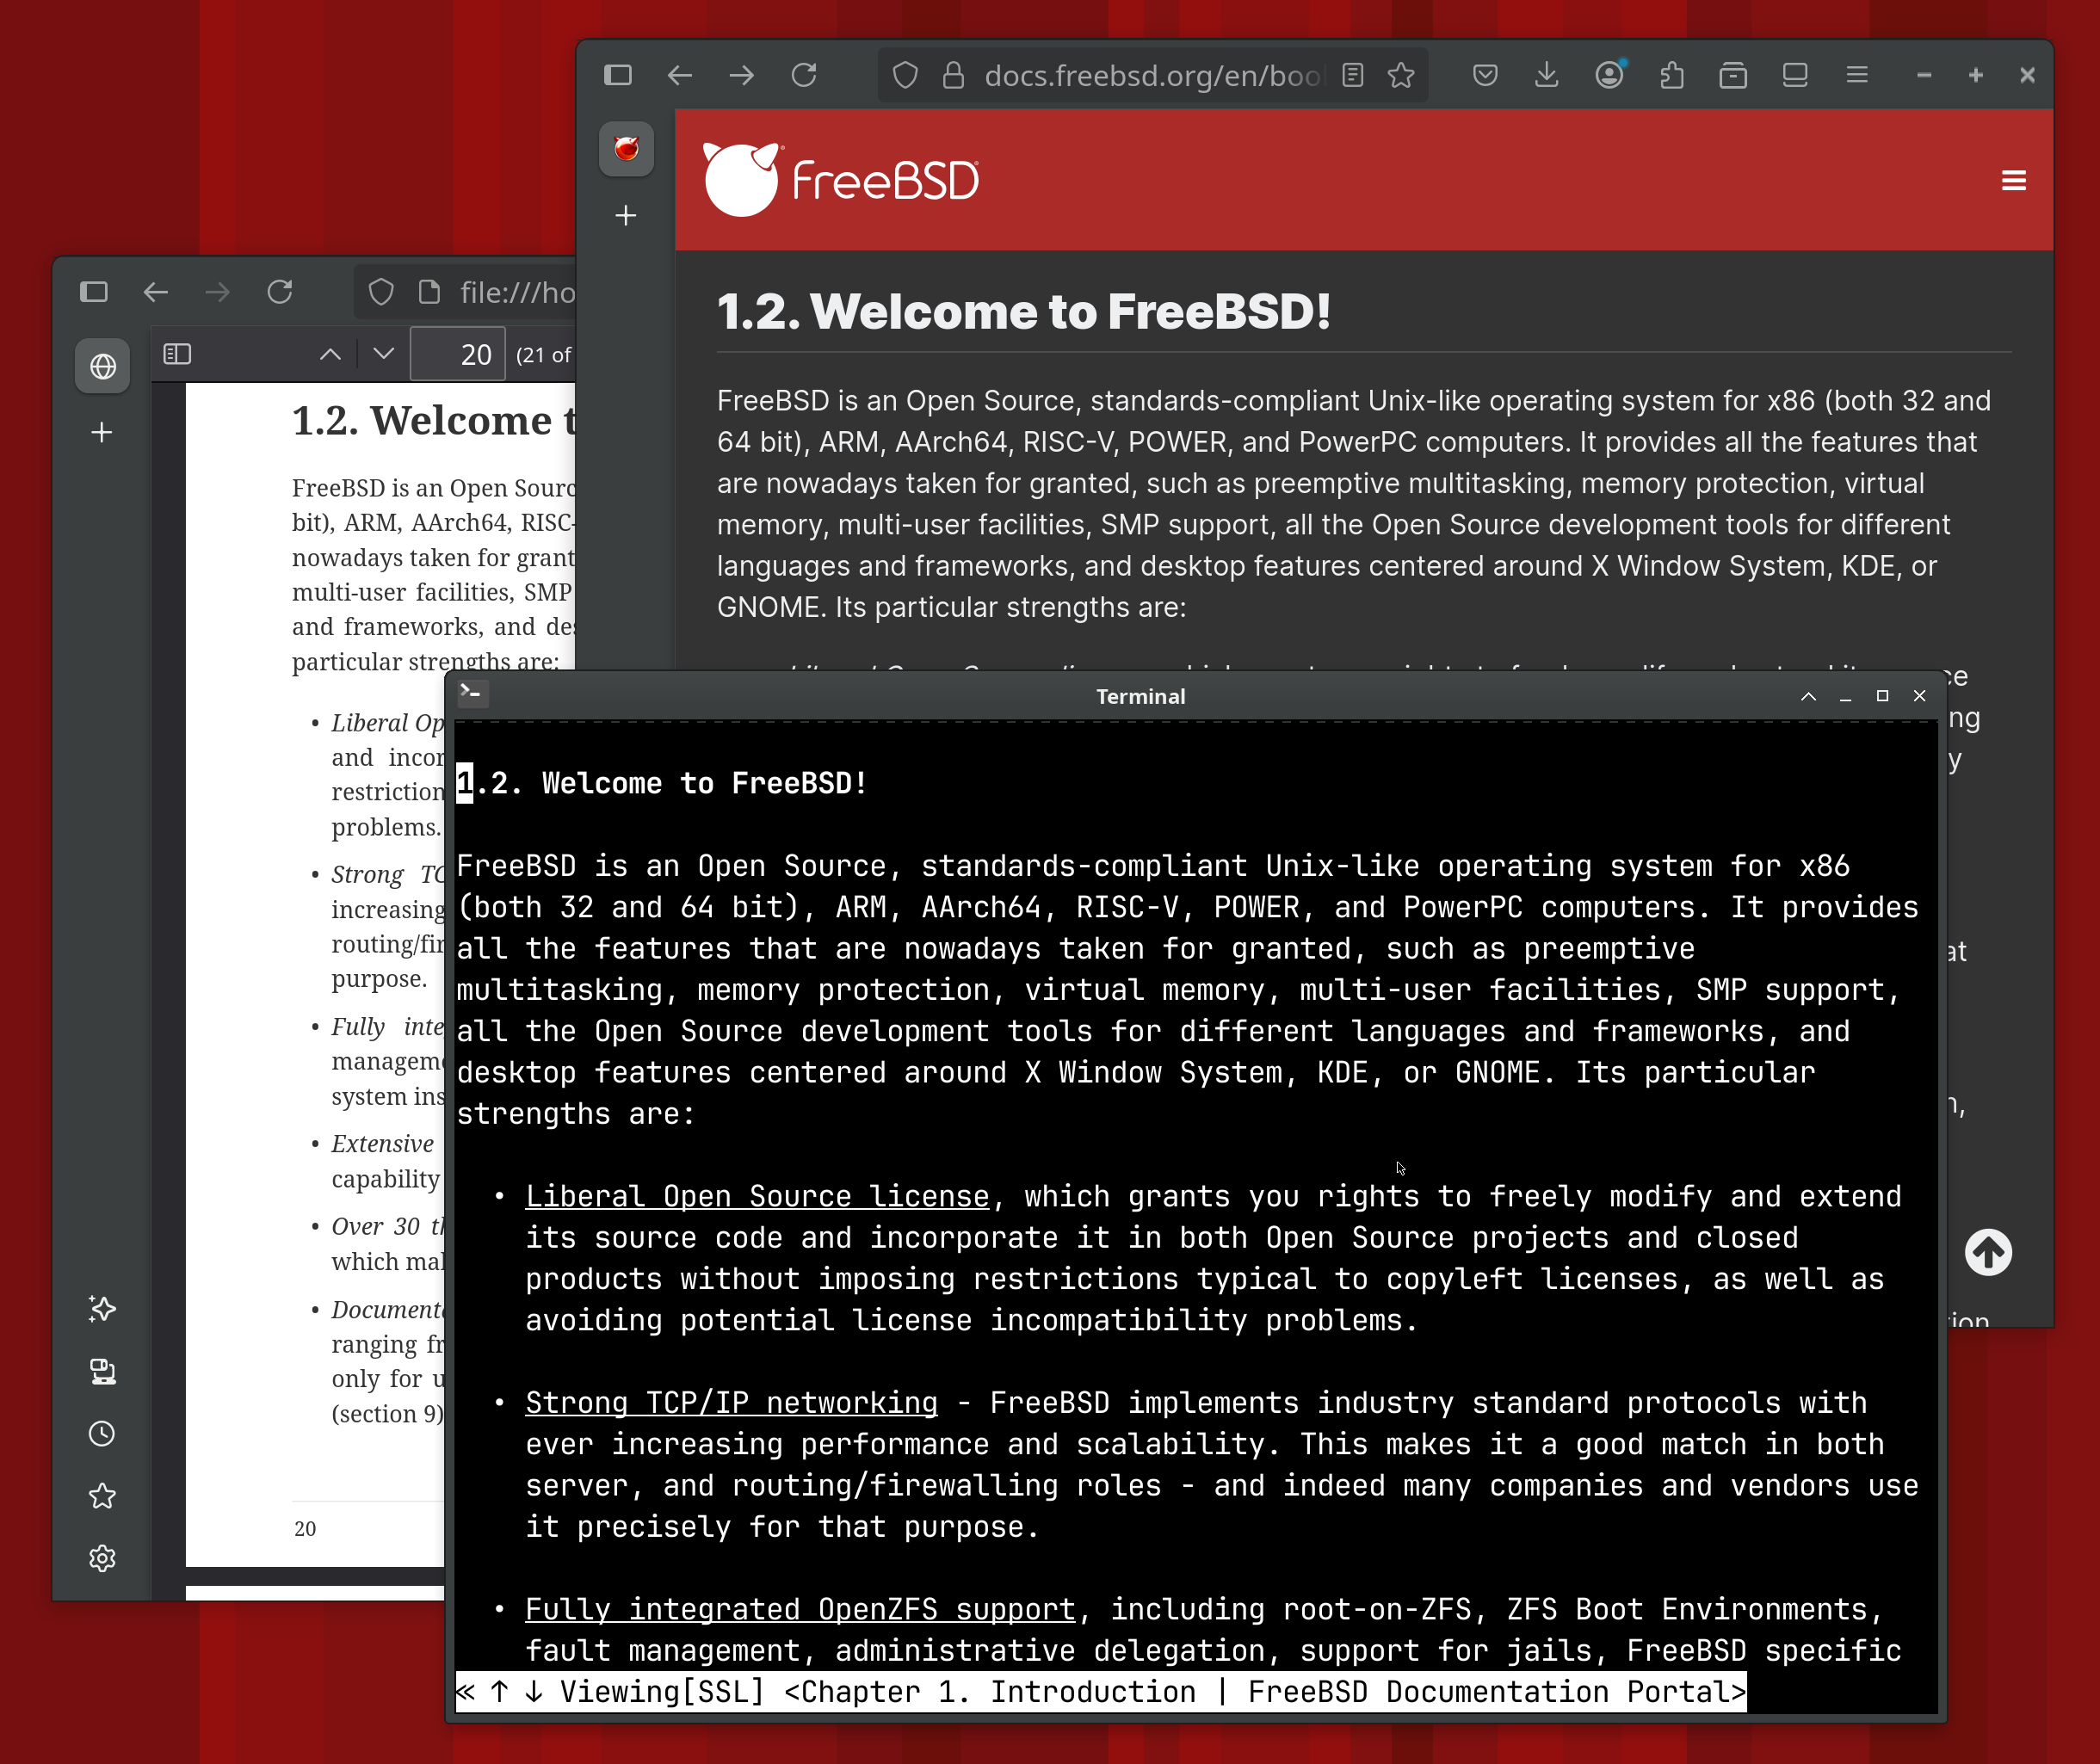
Like all FreeBSD documentation, not only is the FreeBSD Handbook informative, it is also very accessible. As the screen shot shows, you can view the handbook in a graphical browser, in a text based browser, or in a printable PDF format. Regardless of whether you’re a casual user or a kernel developer, FreeBSD’s documentation has something for you and in a format that meets your needs.
Community
The FreeBSD community is vibrant and collaborative. Engage virtually on IRC, Discord, or the mailing lists; or attend a FreeBSD event. And be sure to checkout all the community engagement driven by the FreeBSD Foundation.
FreeBSD Jounal
The FreeBSD Foundation publishes regular updates on a variety of topics, but one well-curated means of communication is the FreeBSD Journal. Published every other month, the Journal spotlights original content from throughout the FreeBSD community.
In the Journal you’ll from articles from people in leadership positions within the project, such as the head of the Release Engineering Team. You’ll find colorful interactions from community icons and prolific authors. You’ll hear perspectives from people who attented conferences and summits. And you’ll get great in-depth articles from people who are passionate about problems they’ve solved and eager to share. It’s just a small piece of what makes the FreeBSD community so great.
